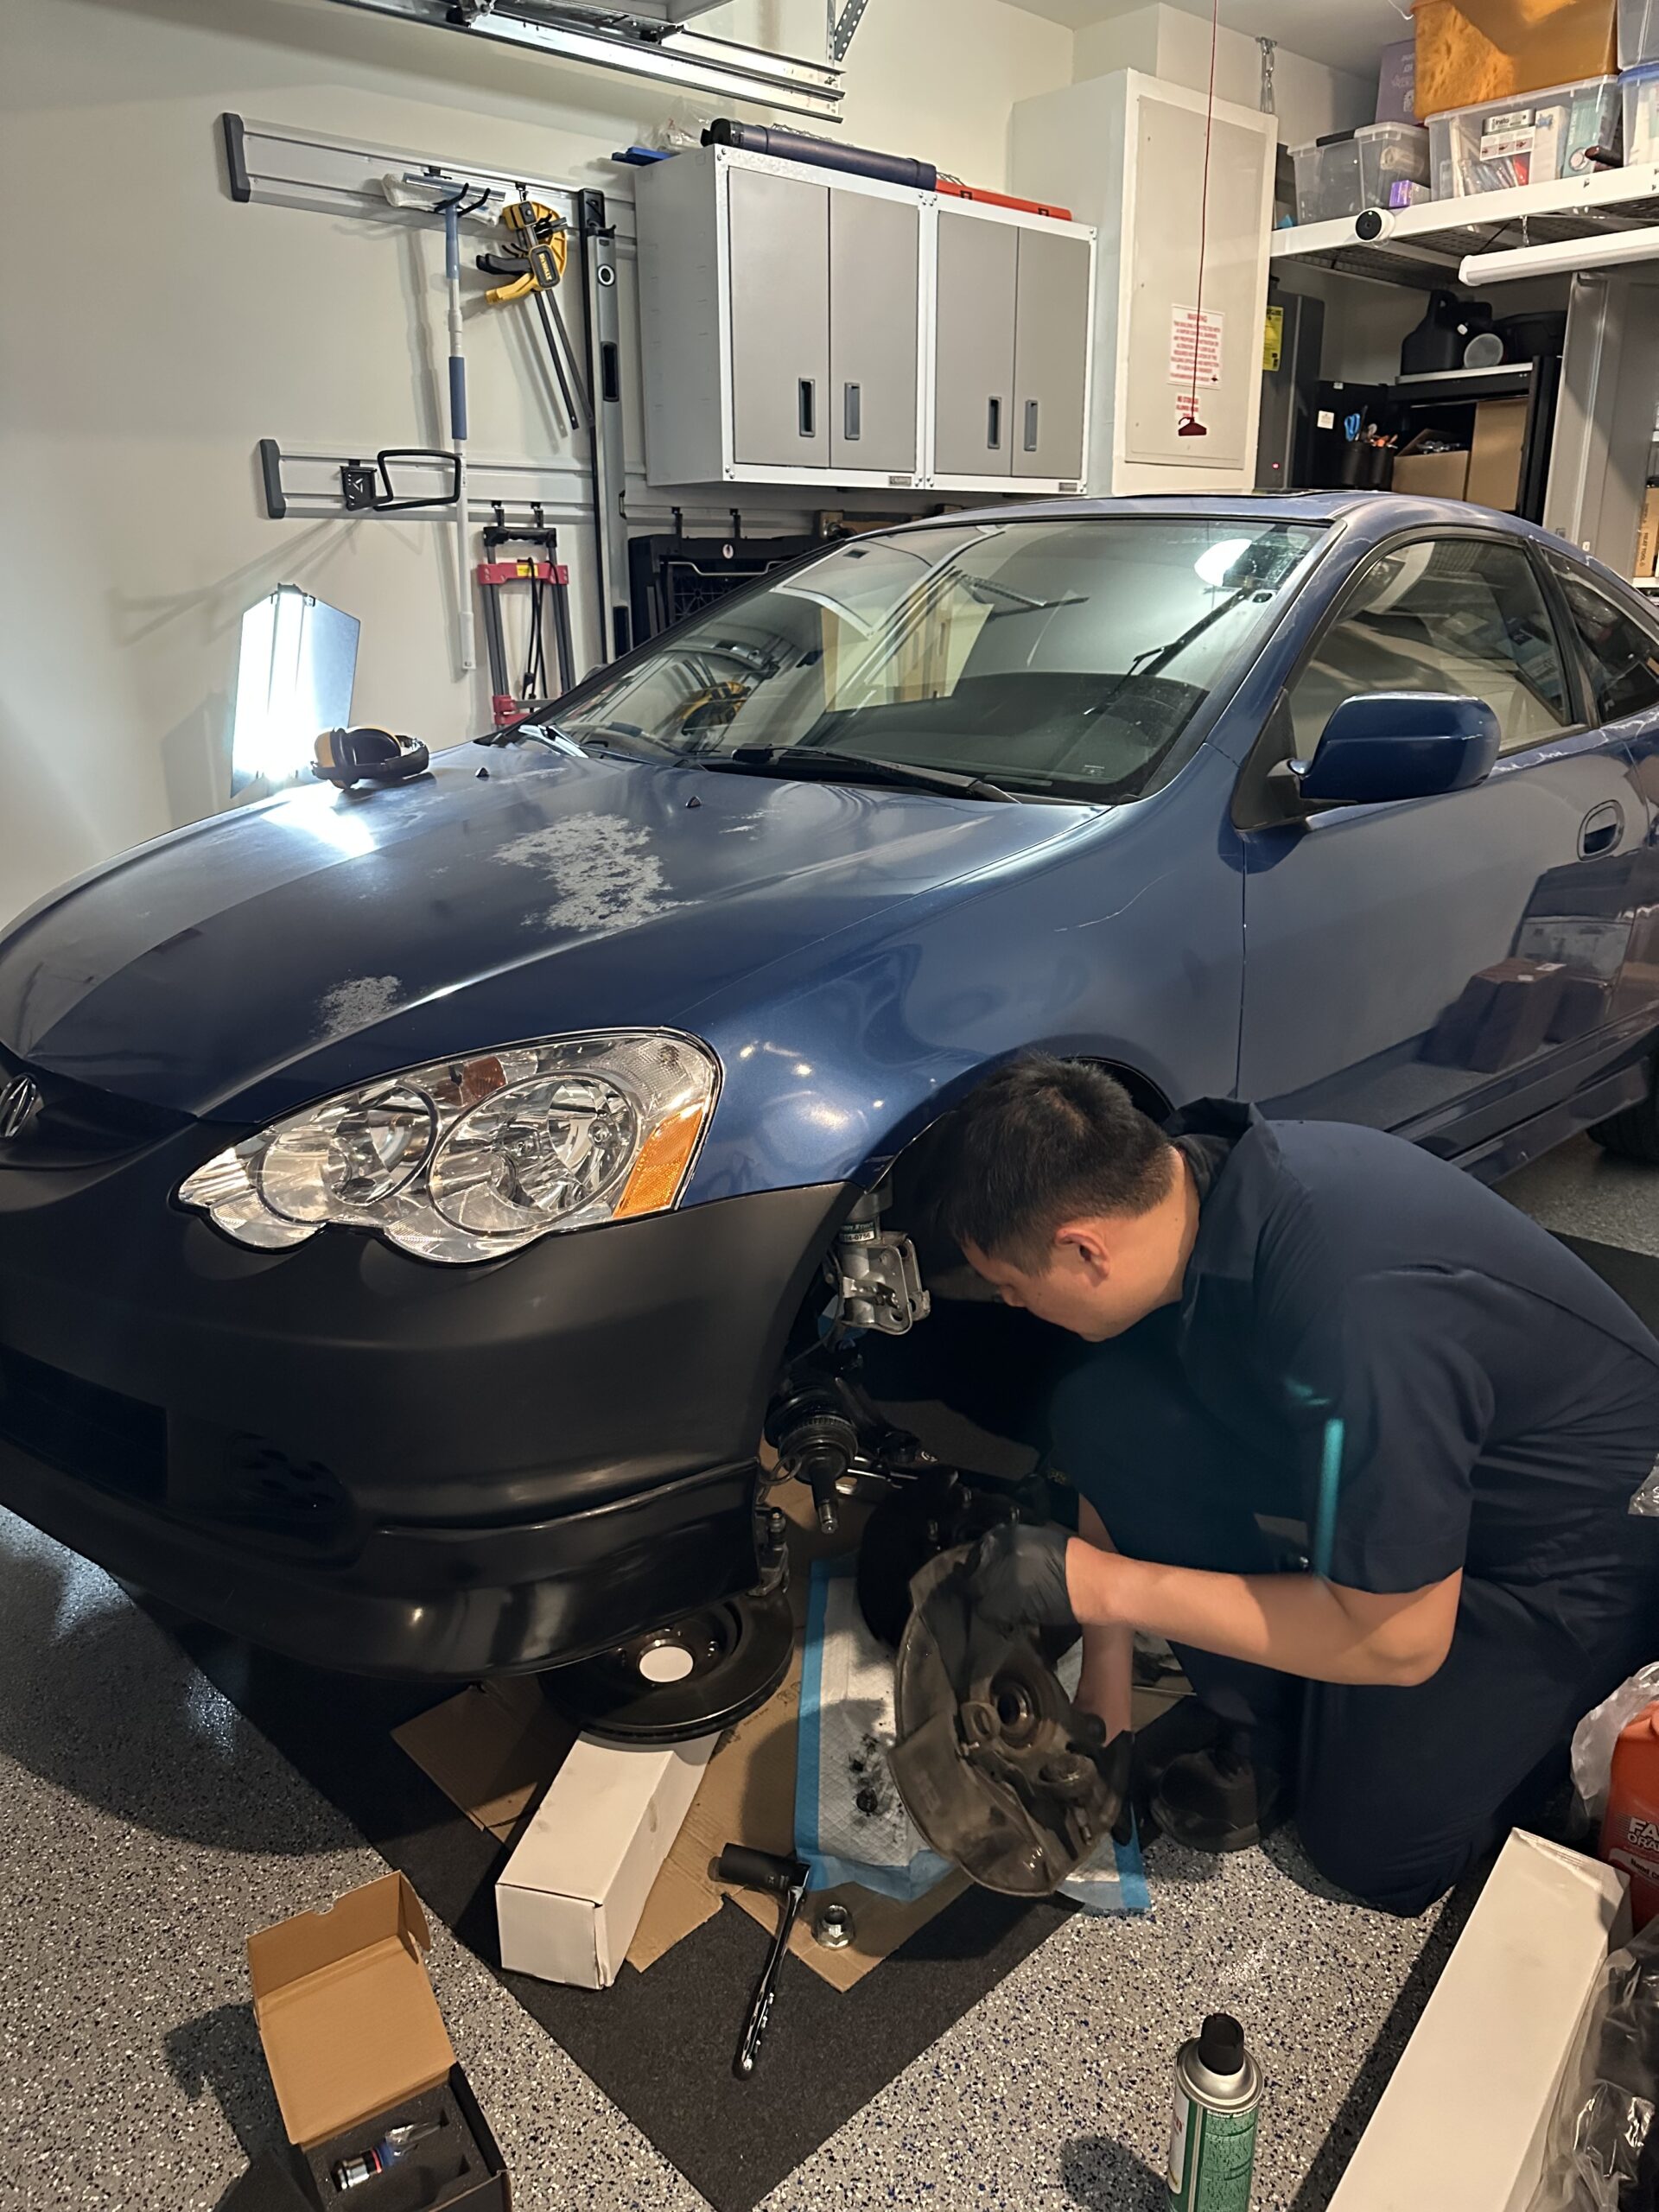
After installing the new Ktuned Lower Control Arms on the front side of the DC5 / RSX, the car still isn’t driving correctly. There was a clanking noise coming from the driver side. It was clear that something was wrong. I jacked up the car once more and saw one side had popped out and was essentially tearing up the axle boot. The other side was still pressed in but the ball joint itself was torn. I pretty much needed to install a set of new ball joints on the car and press the old ones out of the front knuckle.
Types of Ball Joints to buy
When choosing ball joints, there are several options to choose from in the Aftermarket space. There are standard ball joints and roll center ball joints. Unfortunately you can’t order new ones from Honda/Acura because they only sell the full assembly of the knuckle and ball joint already pressed in it. That option is very pricey and a route I did not want to take. I decided to pick a roll center ball joint that’s essentially longer. My plan in the very near future is to lower the car on coilovers so adding them now felt fine.
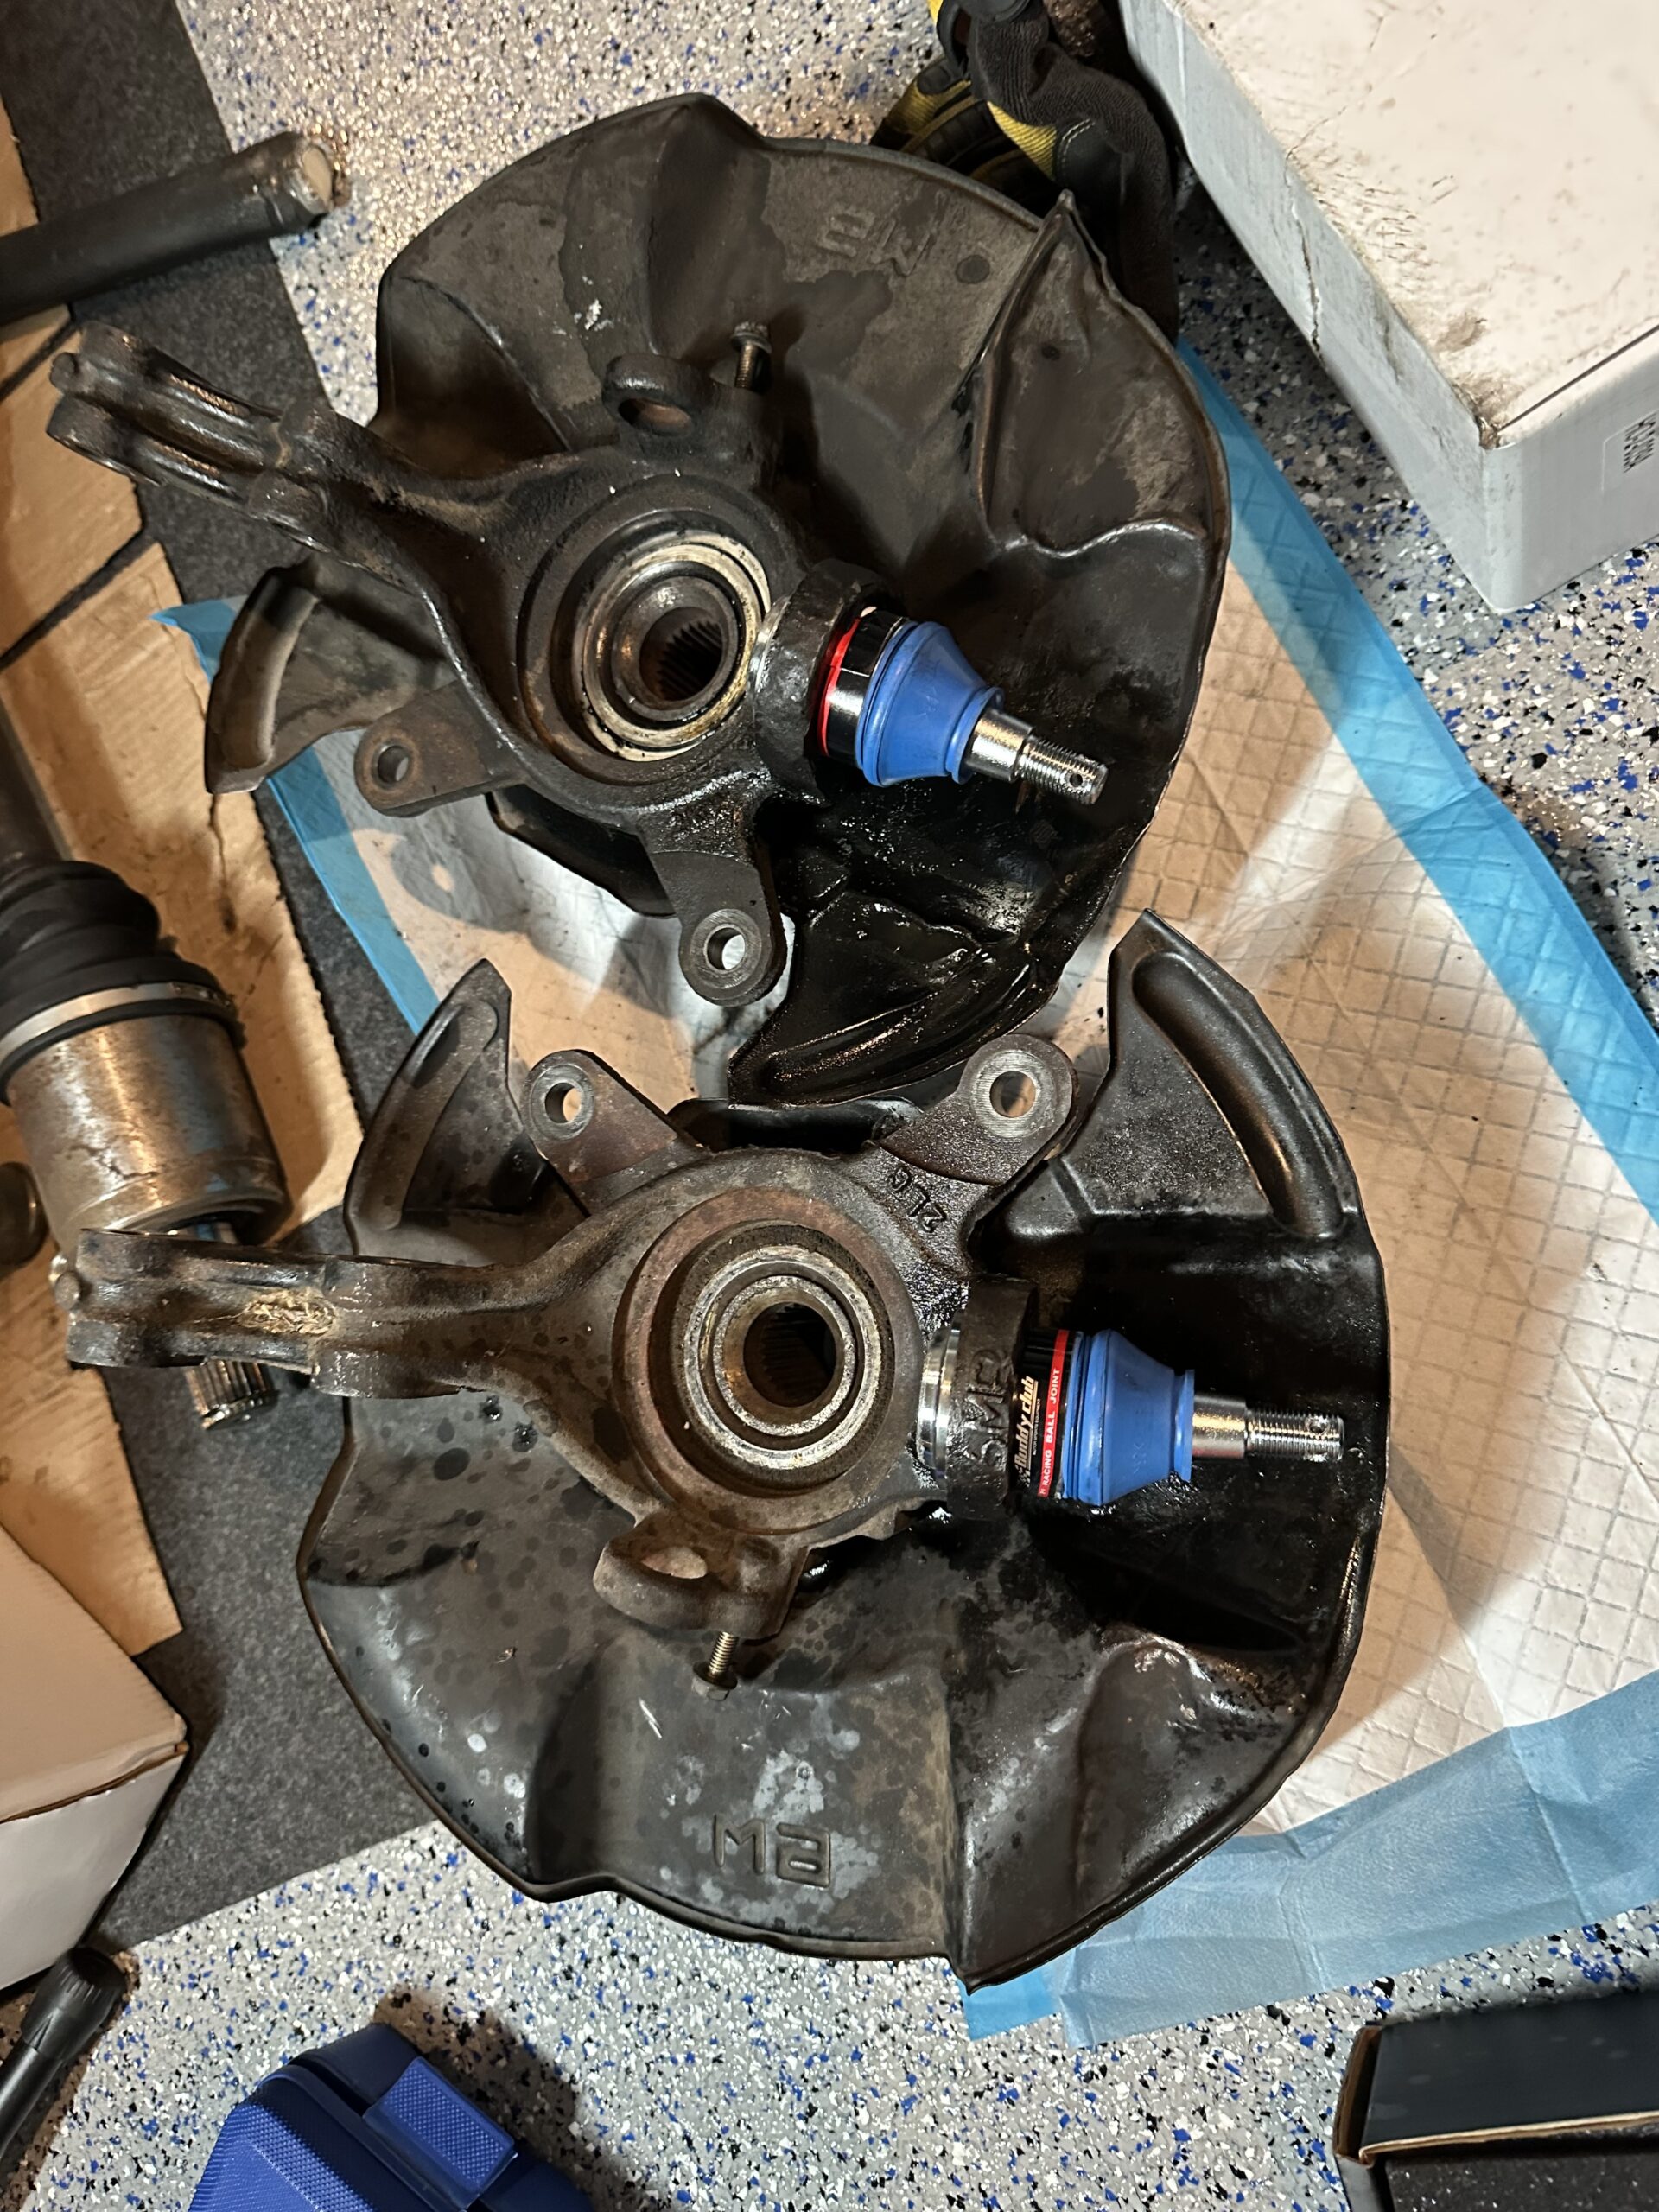
The places that make roll center ball joints that I was aware of was Ktuned and Buddy Club. While I was planning on picking up the set of Ktuned roll center ball joint, it was on backorder for several weeks/months. I did not want to wait for it so I ordered the Buddy Club P1 ball joint, part # BC02-BJp1-H004. There’s a video of it’s unboxing on my YouTube Channel. Buddy Club P1 comprises of 2 ball joints with the castle nuts and cottier pins needed to secure it further after torquing it down to spec.
I prefer the Ktuned one because it comes with a snap ring to lock the ball joint in place. Unfortunately, I really had no option at this moment. I even called Buddy Club on the phone and their technician rep to ask about the snap ring. He told me that pressing them should be enough to keep them in and that’s what stock does too. While I’m not sure why the original ball joint was loose, I decided to try it. I’ll just have to keep a eye on this over the next few months of driving and make sure.
Buddy Club P1 Balljoint Installation
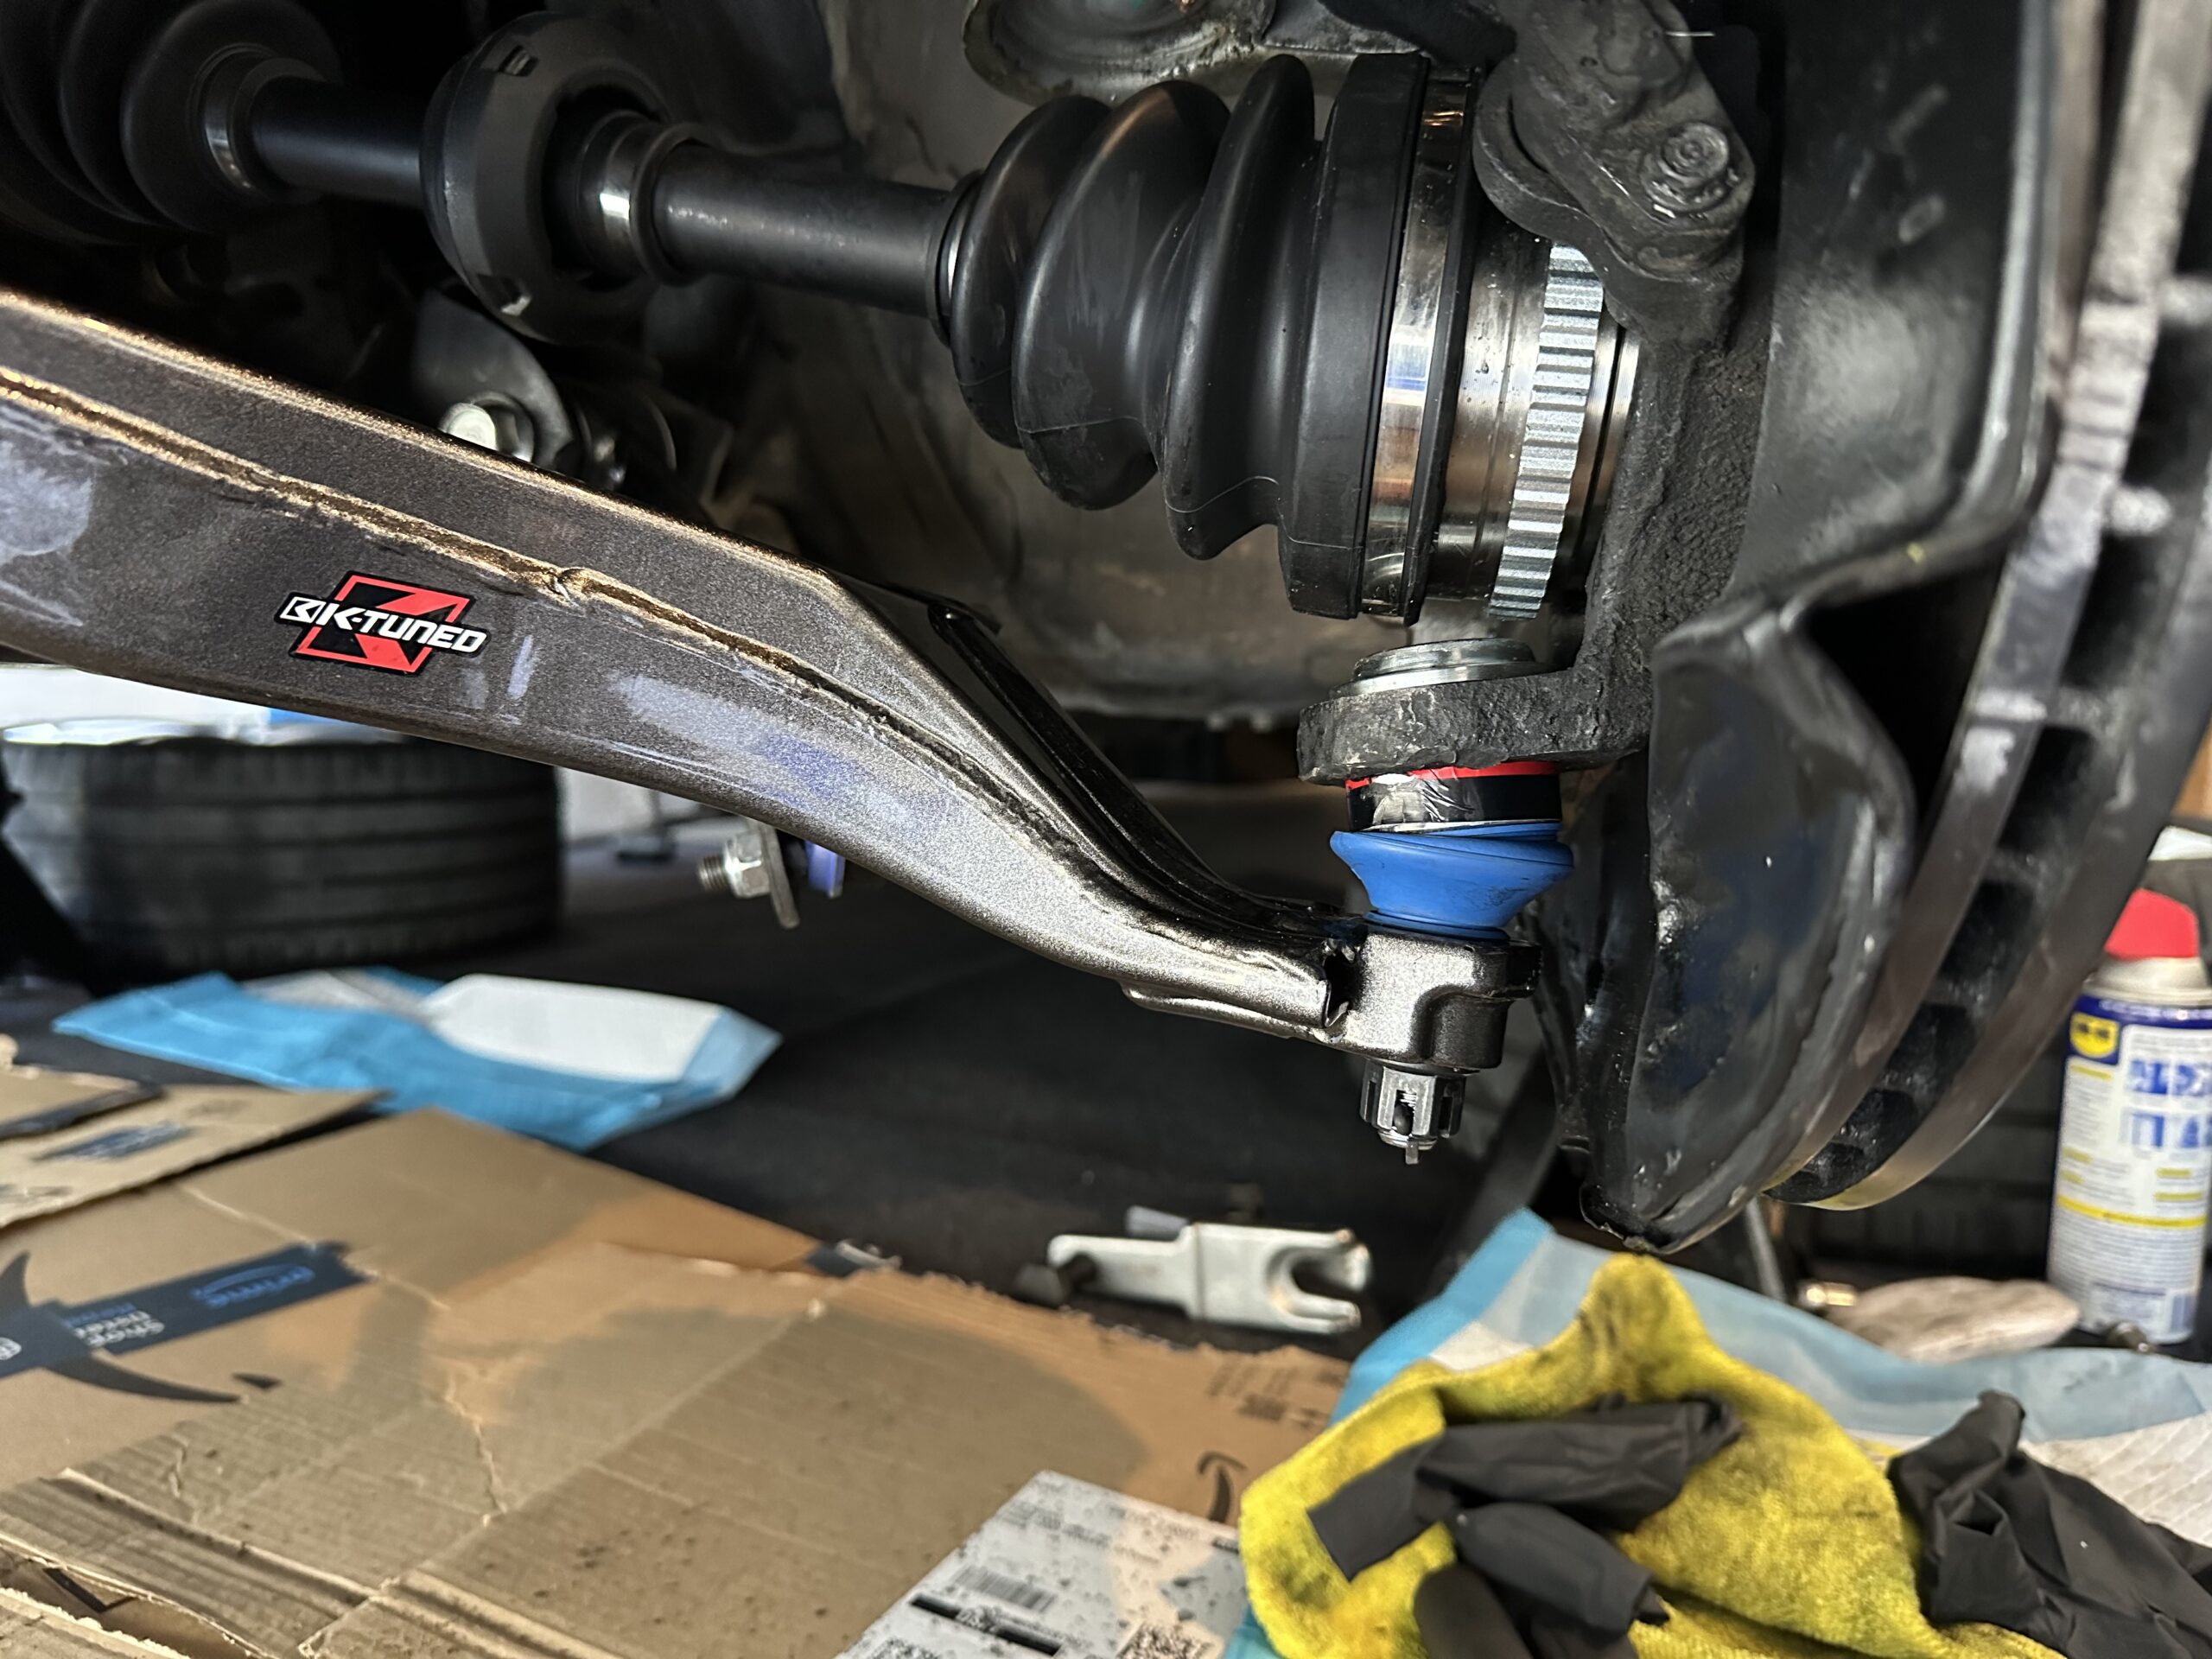
Here’s a few photos of the install below. The entire process involved popping out the ball joint again from the control arm using a puller tool. Then unbolt the two bolts from the shock as well as removing the axle nut to let out the axle. Once the knuckle is disconnected from the car, you can begin pressing out the ball joint from a ball joint press kit. I cleaned up the grease along the knuckle and then began pressing the Buddy Club P1 ball joint in. Then it’s all about re-installing the knuckle back into place and torquing everyone back to spec.
Don’t forget to put the cottier pin in as it’s a safety buffer just incase it comes loose. Was it difficult? A little bit in the sense that removing and pressing is always based on how old and rusty the car is. It was a bit of a messy job in terms of a torn boot, but once everything was out, it was a simple process after.
You can see the full install video here:
Removing torn ball joints & installing Buddy Club Roll Center ball joints on my Acura RSX Type S/DC5