

My RSX Type S interior is 20 years old. One thing that stands out the most is the front seats are torn. It’s also dry like alligator skin. My rear seats are cracking along the leather and carpet is torn near the driver pedal area., and the steering wheel is torn and cracking. The shift boot is rough and replaced with a cheap aftermarket knockoff of the Bride design. I also noticed the rear view mirror surface is peeling. Last but not least, the Window tints are flaky and peeling which is making it hard to see. We are ready for a full interior overhaul!

I’m planning out a DC5 Integra Type R interior conversion. It’s going to involve replacing the front seats with the Recaro SR4 bucket seats. The Type R rear seat that comes in suede, and a replacement of the old carpet with a Type R RHD drive carpet that I will need to make adjustments to work with LHD. While I’m doing this, I plan on changing to the Type R door panels which is really about change the door sills.
My process for removing the interior
To begin, I am ripping out the old interior starting with removing the seat belts and rear interior panels.


In the photo, you can see excess wires from an old stereo system. I will have to remove the wires slowly making sure I don’t disrupt active wires from the OEM harness itself. Make sure you remove the seatbelt bolts carefully and keep track of them. During the removal, I actually hand screwed the bolts back where they were after taking off the seat belt.
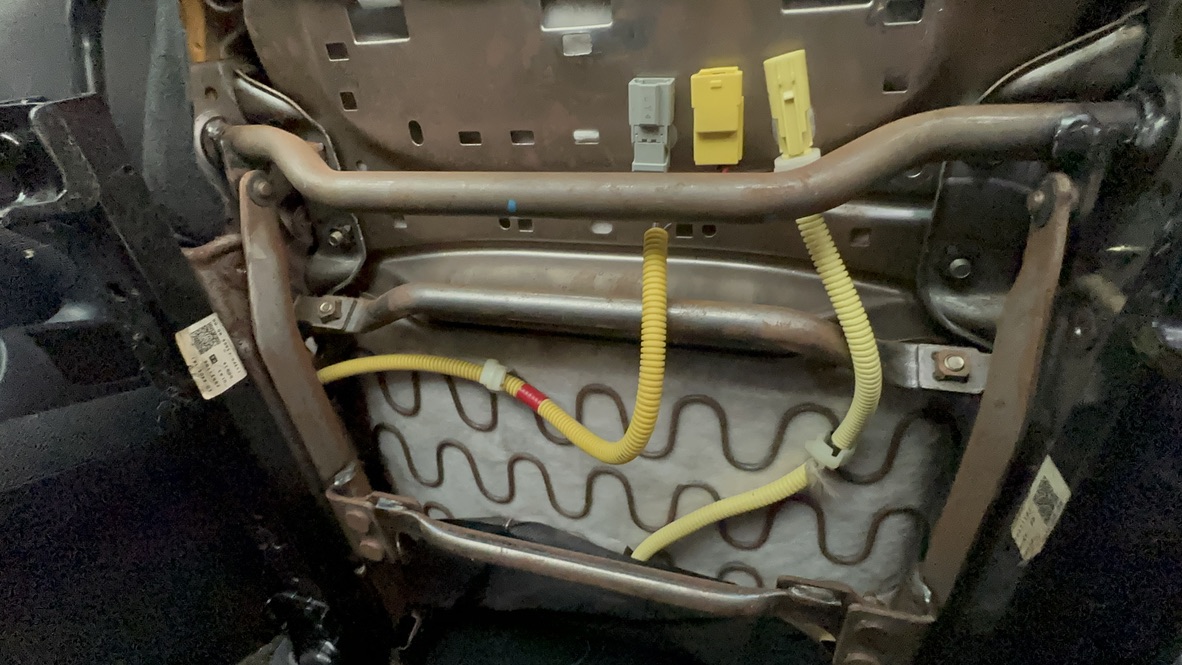
Next, I unbolted the 4 bolts holding the seatbelt bracket. That allowed me to drop the front seat on it’s side in order to look at the wiring harness. In the photo below, we are removing the SRS connections in yellow form the seat. Make sure you disconnect the battery before as you do this.

Once everything is free, you can remove the seats from the car. The passenger front seat is more difficult as you have to unbolt the stock bose amplifier from the rear seat bracket. There’s also it’s own SRS harness too.


Afterwards, you’ll want to remove the plastic center console. There are a few bolts in the front, and in the far back. I don’t reommend using a standard flat head screw driver. I used a plastic screw driver or wedge tool that allowed me to pry without scratching the plastic material. One you have everything out, you can clean and vacuum the carpet. If you plan on throwing it away, you can probably skip this step.

Final result of removal
In order to remove the carpet, you will have to cut the carpet in the center console. That is near the shifter box and the ebrake. I was hesitant on this at first, but there really was no other way. The carpet was pretty dirty, I still kept it in storage just incase another DC5 owner needed it. For me, I knew I could not fix this. Notice the torn carpet near the dead pedal holes for the driver area. 
You should have all the panels removed from the car. I had a stack of them in my garage.

Cleaning the RSX interior
The interior was filthy. I ended up degreasing everything and wiping it down with several dozen microfiber towels. You’ll have to repeat the cleaning process several times until it’s clean to your liking.


The overall process took a few hours. My final step was using alcohol to wipe everything down. A metal brush was to scrub things down. I was prepping the surface for dynomat. This was the final result below.


Installing Dynomat in my RSX
I got Dyanmat Xtreme to help reduce road nosie, exhaust heat, and help with sound quality. Sure it adds weight, but I was not repping a race car. I want a comfortable street car that I can take occasionally to the track, otherwise, I would gut the full interior and call it day. The box comes with 9 sheets. A total of 36 square feet. I test fit everything putting the sheets where it would be. You will need a small roller pin and a box knife to cut the sheets before peeling them. Especially parts where wires and bolt holes need to be exposed.
The overall process for installing dynomat is just a peel and stick process. You can see more photos of that process below including the final result. At this stage, it’s ready for adding the Type R parts into the car.
You can see a video of it all coming together on my YouTube channel:
DC5 Integra Type R Interior Conversion Part 2: Removing Old Interior & Dynomat Install


